Simple Techniques for Creating Sharp Embroidered Logo Designs
By davidofficial
83 Views
Embroidery logos are used on shirts, caps, jackets, bags, and uniforms every day. A clean logo helps businesses look more professional and trusted. But sharp embroidery does not happen by chance. It takes proper planning, clean artwork, and the right stitching methods to create a polished result.
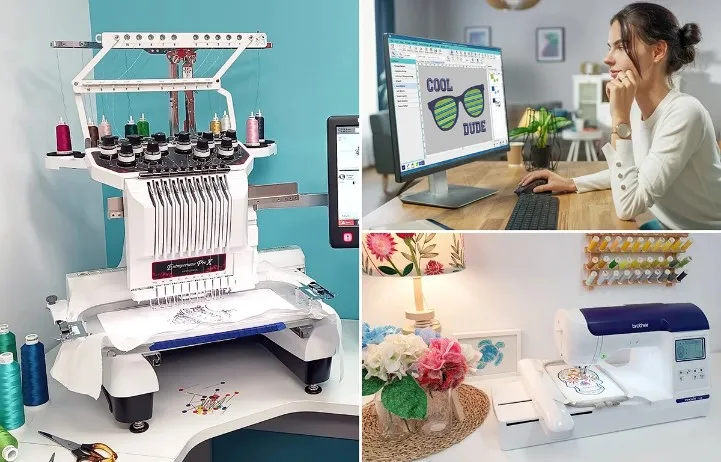
Many embroidery shops use services that convert logo to embroidery file before stitching begins. This process helps embroidery machines understand where to place stitches, what stitch types to use, and how to keep the logo balanced on fabric. A clean embroidery file helps logos look smooth, sharp, and easy to read.
At absolute digitizing, embroidery experts carefully test logo files before production to make sure every design stitches cleanly on different fabrics and products.
Why Sharp Embroidered Logos Matter
A logo is one of the most important parts of branding.
Professional Appearance
Sharp embroidery makes products look high quality.
Better Brand Image
Clean logos help customers trust a business.
Stronger Visual Impact
Neat stitching helps logos stand out clearly.
Long-Lasting Results
Good embroidery stays attractive after washing and use.
Poor logo embroidery can make even expensive products look cheap.
Start with High-Quality Artwork
Every good embroidery logo starts with clean artwork.
Use Clear Images
Sharp images help create better stitch files.
Avoid Blurry Logos
Low-quality artwork may create rough stitching.
Keep Shapes Clean
Simple lines work better in embroidery.
Best Artwork Formats
- AI
- EPS
- SVG
- High-resolution PNG
Good artwork improves embroidery quality from the beginning.
Simplify the Logo Design
Embroidery machines cannot handle every small detail.
Tiny Details Can Disappear
Very small shapes may not stitch clearly.
Thin Lines Cause Problems
Tiny outlines may break during stitching.
Simple Designs Work Better
Bold shapes create cleaner embroidery.
Professional digitizers often simplify logos while keeping the original look strong.
Choose the Right Stitch Types
Different stitches create different effects.
Satin Stitch
Best for text and smooth borders.
Fill Stitch
Used for large design areas.
Running Stitch
Good for outlines and small details.
Using the correct stitch type improves logo sharpness.
Balance Stitch Density Carefully
Density means how close stitches are placed together.
High Density Problems
Too many stitches can make embroidery stiff.
Low Density Problems
Too few stitches may leave gaps.
Balanced Density
Proper density creates smooth and clean stitching.
At absolute digitizing, stitch density is carefully adjusted based on fabric and logo size.
Use Proper Underlay Stitches
Underlay stitches support the top embroidery.
Why Underlay Matters
- Keeps fabric stable
- Improves stitch quality
- Reduces fabric pulling
- Creates smoother designs
Common Underlay Types
Edge Run
Helps create clean edges.
Zigzag Underlay
Supports satin stitches.
Fill Underlay
Supports large stitched areas.
Good underlay improves logo sharpness greatly.
Match the Design to the Fabric
Different fabrics react differently during embroidery.
Cotton Fabric
Easy and stable for embroidery.
Stretch Fabric
Needs extra support and balanced stitching.
Thick Fabric
May require lighter stitch density.
Soft Fabric
Needs careful hooping and stabilizer support.
Matching stitch settings to fabric improves final results.
Use Quality Stabilizers
Stabilizers help hold fabric steady during stitching.
Why Stabilizers Matter
Without support, fabric may shift or wrinkle.
Common Stabilizer Types
Cut-Away Stabilizer
Best for stretch fabrics.
Tear-Away Stabilizer
Works well on stable woven fabric.
Wash-Away Stabilizer
Used for delicate materials.
Good stabilizers help logos stay clean and balanced.
Hoop Fabric Correctly
Good hooping keeps fabric tight and flat.
Loose Fabric Causes Problems
Fabric movement can ruin logo shapes.
Do Not Overstretch Fabric
Too much pulling may distort the design.
Smooth Out Wrinkles
Flat fabric improves stitch quality.
Proper hooping is one of the easiest ways to improve embroidery results.
Choose Quality Thread
Thread quality affects logo appearance.
Strong Thread Runs Better
Good thread reduces breaks and fraying.
Cheap Thread Causes Issues
Weak thread may snap during stitching.
Match Thread to Fabric
Different projects may need different thread types.
Quality thread helps logos look smooth and bright.
Use the Correct Needle
Needles play a big role in embroidery quality.
Sharp Needles
Best for woven materials.
Ballpoint Needles
Good for stretch fabrics.
Replace Old Needles
Dull needles can damage fabric and thread.
Fresh needles improve stitching accuracy.
Keep Thread Tension Balanced
Thread tension controls stitch quality.
Tight Tension Problems
- Thread breaks
- Fabric puckering
- Rough stitching
Loose Tension Problems
- Loops under fabric
- Weak stitches
- Messy embroidery
Balanced Tension
Creates smooth and even stitches.
Testing tension before production improves embroidery quality.
Plan Stitch Direction Carefully
Stitch direction changes the look of embroidery.
Better Shine
Thread reflects light differently at different angles.
Improved Texture
Different directions add depth to logos.
Reduced Fabric Pull
Balanced stitch angles reduce puckering.
Professional stitch planning creates cleaner embroidery.
Keep Logos at the Right Size
Logo size affects stitch quality.
Small Logos Need Simpler Details
Tiny text may not stitch clearly.
Large Logos Need Balanced Density
Too much stitching may damage fabric.
Medium Sizes Work Best
Balanced sizing improves readability and appearance.
Good sizing helps logos stay sharp.
Test the Logo Before Full Production
Testing is one of the most important steps.
Why Testing Matters
Designs may stitch differently on real fabric.
What to Check
- Stitch quality
- Fabric movement
- Thread tension
- Design clarity
- Color balance
Small adjustments during testing improve final embroidery results.
At absolute digitizing, logo samples are tested carefully before final delivery.
Avoid Common Logo Embroidery Mistakes
Overcrowded Designs
Too many details create messy stitching.
Poor Artwork Quality
Low-resolution images reduce embroidery clarity.
Wrong Stabilizer Choice
Weak support may cause puckering.
Heavy Stitch Density
Too many stitches can damage fabric.
Avoiding these mistakes improves embroidery quality greatly.
Keep Machine Speed Under Control
Fast stitching may create problems.
Slower Speed Helps
- Improve detail quality
- Reduce thread breaks
- Create cleaner corners
Detailed logos often stitch better at slower speeds.
Maintain the Embroidery Machine
A clean machine creates better embroidery.
Remove Lint Often
Lint buildup can affect stitching.
Oil Moving Parts
Follow machine maintenance instructions.
Check Thread Paths
Thread should move smoothly without catching.
Machine care helps maintain logo quality.
Use Simple Color Combinations
Too many colors can make logos look busy.
Limit Color Changes
Fewer changes improve stitching flow.
Use Strong Contrast
Clear contrast improves logo visibility.
Match Brand Colors
Consistent colors strengthen branding.
Simple color planning creates stronger embroidery results.
Why Experience Matters in Logo Digitizing
Embroidery digitizing is a learned skill.
Experts Spot Problems Early
Experienced digitizers know what may fail during stitching.
Better File Planning
Professional stitch paths improve machine performance.
Smarter Design Adjustments
Experts know how to simplify artwork correctly.
Experience helps create sharper and cleaner embroidery logos.
Benefits of Sharp Embroidered Logos
Better Branding
Professional logos build trust.
Cleaner Products
Smooth stitching improves appearance.
Longer Lasting Designs
Balanced embroidery stays strong after washing.
Faster Production
Good files reduce machine problems.
Sharp logos improve product quality and business image.
Best Habits for Clean Logo Embroidery
Use High-Quality Artwork
Clear designs create better results.
Test Every Design
Always run sample stitching first.
Match Designs to Fabric
Different fabrics need different settings.
Keep Designs Simple
Simple logos stitch more cleanly.
These habits help create strong embroidery results.
Final Thoughts
Creating sharp embroidered logo designs takes careful planning, quality materials, and smart stitch techniques. Good artwork, balanced density, proper underlay, and correct machine setup all work together to improve embroidery quality.
Small changes in stitch direction, thread tension, or stabilizer choice can make a huge difference in the final look of a logo. That is why testing and experience are very important in embroidery work.
With the right methods and attention to detail, businesses can create clean and professional embroidered logos that look sharp, strong, and long-lasting on every product.